Chicken Breast
J. Kenji López-Alt is the Managing Culinary Director of Serious Eats, author of the James Beard Award-nominated column The Food Lab, and a columnist for Cooking Light. He lives in San Francisco. A New York native, Kenji cut his cooking chops the old-fashioned way by wo ...
You wanna know the secret to the moistest, juiciest chicken? Temperature control. The kind of down-to-the-degree control that only sous vide cooking can get you. If there’s one dish that shows the most dramatic difference from traditional cooking methods, it’s chicken breast. Luckily, it’s also one of the easiest dishes to cook, and this guide will show you how to do it step by step.
TEMPERATURE AND TIMING CHART FOR CHICKEN BREAST
Texture: Very soft and juicy, served hot
Temperature: 140ºF / 60ºC
Timing: 1.5 to 4 hours
Texture: Tender and juicy, served cold (for cold chicken salad)
Temperature: 150F / 66ºC
Timing Range: 1 to 4 hours
Texture: Juicy, tender and slightly stringy, served hot
Temperature: 150F / 66ºC
Timing Range: 1 to 4 hours
Texture: Traditional, juicy, firm and slightly stringy, served hot
Temperature: 160F / 71ºC
Timing Range: 1 to 4 hours
Shop Sous Vide Cookers
Precision® Cookers
Perfect results in a few simple steps.
Ingredients for 1
Bone-in, skin-on chicken breast
Salt
Pepper
Fresh herbs (optional)
Lemon (optional)
1 tbsp / 15 ml Vegetable, canola, or rice bran oil
Directions
-
Step 1
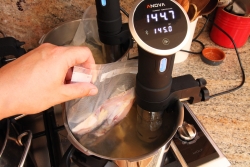
Pre-heat your Precision Cooker to the desired final temperature, according to the chart included here and in the app. Allow the water bath to come to temperature before adding your chicken.
-
Step 2
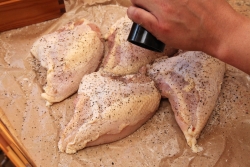
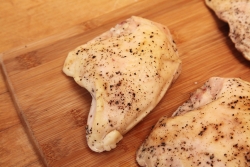
Season bone-in, skin-on chicken breasts generously with salt and pepper.
-
Step 3
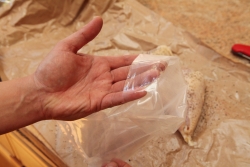
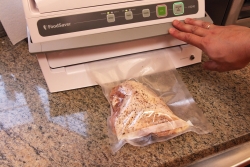
To bag chicken breasts, start by folding the top of a vacuum-seal or zipper-lock bag back over itself to form a hem. This will prevent chicken juices from getting on the edges of the bag which would interfere with the seal or provide vectors for contamination.
-
Step 4
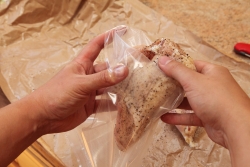
Slide the chicken breasts into the bag along with any aromatics such as fresh herbs or lemon slices (if using).
-
Step 5
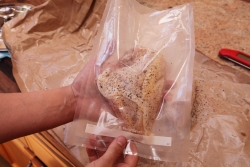
Unfold the edge before closing the bag.
-
Step 6
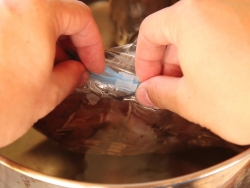
Seal the bag either using a vacuum sealer or, if using a zipper-lock bag, by using the water displacement method shown in the next step.
-
Step 7
To seal the bag using the water displacement method, slowly lower your bagged chicken into a pot of water, letting the pressure of the water press air out through the top of the bag. Once most of the air is out of the bag, carefully seal the bag just above the waterline.
-
Step 8
Drop the bag in the water bath, making sure not to block the intake or output sections of your Precision Cooker. If properly sealed, chicken should sink. Cook according to the desired time and temperature selected from the variations in the Anova app.
-
Finishing Steps - Stovetop
-
Step 0
Remove the chicken from the bag, discard any aromatics (if using) and place it on a paper towel-lined plate. Pat it dry very carefully on both sides. Place a heavy cast-iron or stainless steel skillet with one tbsp / 15 ml of vegetable, canola, or rice bran oil over medium-high heat until shimmering. Because skin-on chicken has natural insulation, it’s not necessary to use the super-high heat that is required for searing things like steaks or pork chops.
-
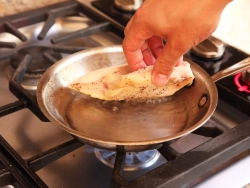
Step 1
Carefully add the chicken to the hot oil, skin side down.
-
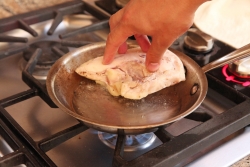
Step 2
For best results, use a flexible slotted fish spatula or your fingers to hold the chicken down against corner of the pan in order to maximize contact between the chicken skin and the hot oil and metal. Tilting the pan towards the chicken to help the fat pool up under the skin can also help. Be careful, the chicken may splatter and pop as it sears. I recommend wearing gloves and long sleeves if you are very sensitive to small oil splatters.
-
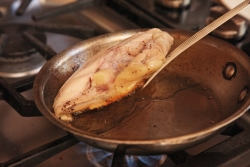
Step 3
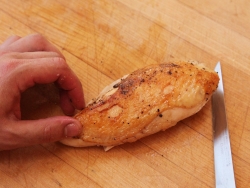
Carefully lift and peek under the chicken as it cooks to gauge how quickly it is browning. Let it continue to cook until the skin is deep brown and very crisp. This will take about two minutes total.
-
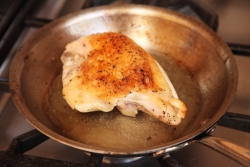
Step 4
Remove chicken from pan and let it rest until cool enough to handle, about two minutes.
-
Step 5
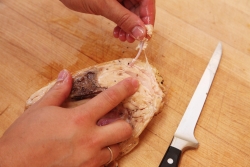
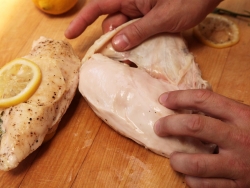
As soon as the chicken is cool enough to handle, carefully remove the wishbone, which runs along the fatter end of the breast. It should pull right out (there may not be a wishbone if it was removed in-store).
-
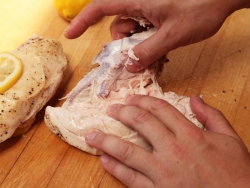
Step 6
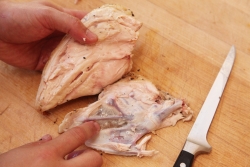
Next peel the breast off of the breastbone by running your thumb in between the meat and the bone. It should come right off.
-
Step 7
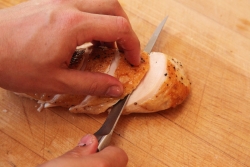
Use a sharp chef’s knife or boning knife to slice the chicken on a bias.
-
Step 8
Cut the chicken into 3 to 4 thick slices to make it easier to eat when serving.
-
Step 9
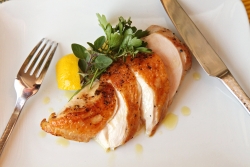
Serve the chicken immediately garnished with lemon wedges, extra virgin olive oil, or a vinaigrette or sauce as desired.
-
Finishing Steps - Grill
-

Step 0
Remove the chicken from the bag, discard any aromatics (if using) and place it on a paper towel-lined plate. Pat it dry very carefully on both sides. Let the chicken cool slightly while you preheat your grill (if you place it directly on the grill, it will overcook while it crisps).
-
Step 1
Light one half chimney full of charcoal. When all the charcoal is lit and covered with gray ash, pour out and arrange the coals on one side of the charcoal grate. Set cooking grate in place, cover grill and allow to preheat for 5 minutes. Alternatively, set half the burners on a gas grill to medium heat setting, cover, and preheat for 10 minutes. Clean and oil the grilling grate.
-
Step 2
Place the chicken skin side down on the hotter side of the grill and cook. Carefully lift and peek under the chicken as it cooks to gauge how quickly it is browning. Let it continue to cook until the skin is deep brown and very crisp. This will take about five minutes total. Remove chicken from grill and let rest until cool enough to handle, about two minutes. Remove bones and carve according to instructions in the stovetop section.
-
Finishing Steps - Cold Chicken Salad
-
Step 0
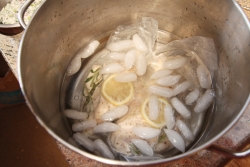
Drop the bagged chicken breasts into an ice bath and let them rest until completely chilled, about 10 minutes.
-
Step 1
Remove the chicken breasts from the bags, discard aromatics, peel off the skin, and discard. Make sure to get any membranes that remain over the meat!
-
Step 2
Remove the breast bones and the wishbones from the chicken and discard or save for stock. It should pull out easily with just your fingers.
-
Step 3
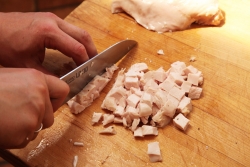
Split the chicken horizontally lengthwise then cut it into 1/2-inch / 1-cm strips. Cut crosswise to create 1/2-inch / 1-cm dice. Use the diced chicken for your favorite chicken salad recipe for extra juicy and tender results.