Sous Vide Rack of Lamb
J. Kenji López-Alt is the Managing Culinary Director of Serious Eats, author of the James Beard Award-nominated column The Food Lab, and a columnist for Cooking Light. He lives in San Francisco. A New York native, Kenji cut his cooking chops the old-fashioned way by wo ...
Rack of lamb isn't cheap, so it's understandable that cooking it can be even more nerve-wracking than cooking a pricey steak. What's more, lamb tends to be leaner and smaller than a steak, which means that it's even more susceptible to accidental overcooking. All of this makes it an ideal candidate for cooking sous vide, which makes overcooking nearly impossible and perfectly edge-to-edge medium-rare results the norm.
Temperature and Timing Charts for Lamb Rack
Smaller New Zealand and Australian lamb needs only around 45 minutes to cook at a minimum. Larger American lamb should be cooked for a minimum of 1 hour. Lamb rack cooked under 130°F / 54.4ºC should not be cooked longer than two-and-a-half hours at a time for food safety reasons.
- Very Rare to Rare
- 115°F / 46°C to 124°F / 51°C
- 1 to 2 1/2 hours
- Medium-rare
- 125°F / 52°C to 134°F / 57°C
- 1 to 4 hours (2 1/2 hours max if under 130°F / 54°C)
- Medium
- 135°F / 57°C to 144°F / 62°C
- 1 to 4 hours
- Medium-well
- 145°F / 63°C to 154°F / 67°C
- 1 to 4 hours
- Well done
- 155°F / 69°C and up
- 1 to 4 hours
Shop Sous Vide Cookers
Precision® Cookers
Sous vide made easier than ever.
Ingredients for 4
2 (8-bone) racks of lamb, about 2 pounds / 900g total
Kosher salt and freshly ground black pepper
Aromatics, such as fresh thyme or rosemary sprigs, sliced shallots, and sliced garlic (optional)
2 tablespoons / 30ml vegetable, canola, or rice bran oil
2 tablespoons / 30g unsalted butter
Directions
-
Step 1
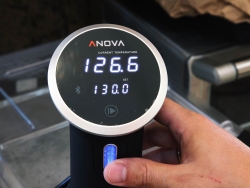
Pre-heat your Precision Cooker to the desired final temperature according to The Food Lab Lamb Guide. Allow the water bath to come to temperature before adding your lamb.
-
Step 2
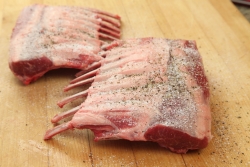
Season the lamb rack generously with salt and pepper on all sides.
-
Step 3
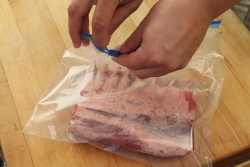
Seal the bag either using a vacuum-sealer or, if using a zipper-lock bag, by using the water displacement method. To do it, seal the zipper almost all the way, leaving about an inch open.
-
Step 4
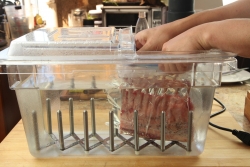
Next, slowly lower your bagged lamb into a tub of water, letting the pressure of the water press air out through the top of the bag, using your fingers to help the air out. Once most of the air is out of the bag, carefully seal the bag just above the waterline. Drop the bag in the water bath and cook. If properly sealed, the lamb should sink. Cook according to your preferred level of doneness in The Food Lab Lamb Rack guide.
-
Finishing Steps
-
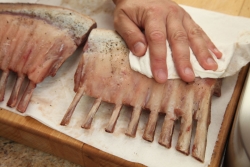
Step 0
Remove the lamb from the bag and place it on a paper towel-lined plate. Pat it dry very carefully on both sides. Lamb cooked sous vide will not have any browning on its surface, so this must be added afterwards for improved flavor and texture. A heavy cast iron or stainless steel skillet on the stovetop makes this easy.
-
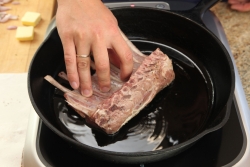
Step 1
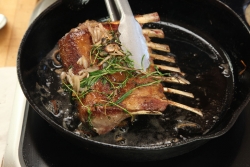
Turn on your vents and open your windows. Place a heavy cast iron or stainless steel skillet with one tablespoon of vegetable, canola, or rice bran oil over the hottest burner you have and preheat the skillet until it starts to smoke. Add the lamb, fat cap side down (bones facing up). Don't crowd the pan which can cause it to cool too much. Instead, work in batches if your pan is not large enough.
-
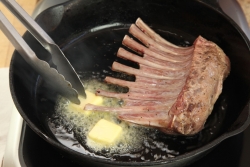
Step 2
Add a tablespoon of butter, swirling the pan to let it melt.
-

Step 3
If desired, add aromatics like whole thyme or rosemary sprigs, or roughly chopped shallows and garlic cloves.
-
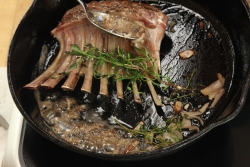
Step 4
Continuously move the lamb around to ensure that it's evenly seared. Meanwhile, baste the lamb with the flavored butter by tilting the skillet towards you and spooning the collected fat on top of the lamb using a large spoon.
-
Step 5
As soon as the first side is well browned (this should take less than a minute), flip the lamb and brown the second side using the same technique, then transfer the lamb to a wire rack set in a rimmed baking sheet. Lamb can be immediately carved and served. If you allow it to rest (for up to 10 minutes) you can easily re-crisp the lamb by reheating the pan drippings until smoking-hot, then pouring the drippings over the lamb racks just before carving and serving.
-
Step 6
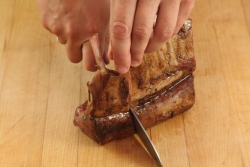
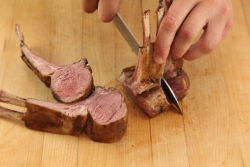
Transfer the cooked lamb to a cutting board and carve it by holding the rack upright (the bones make a good handle) and slicing down in between every other rib with a sharp knife.
-
Step 7
You'll have to work it around a little bit to find the joint between the vertebrae as you reach the bottom (don't force your knife through or you may chip or dull it).
-
Step 8
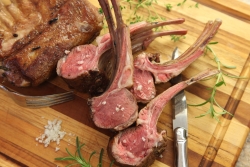
Serve around 4 ribs per person.