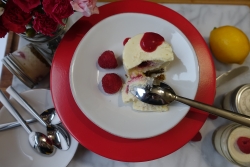
Sous Vide Meyer Lemon Cheesecake with Pistachio Crust & Raspberry Coulis
Chef Nicole is our Content Development Chef at Anova Culinary, devoted to help making your sous vide recipe dreams come true and writing informative blog posts to aid you along the way. She attended culinary school at Ecole Ritz-Escoffier at the Ritz Hotel in Paris, Fra ...
Shop Anova
Anova
Pro-level cooking techniques made simple.
Ingredients for 6
12 oz/~340g cream cheese
1/2 c/95g sugar, Xylitol, erythritol, or granulated monkfruit sweetener
1/4 c/60ml creme fraiche
2 eggs
2 heaping Tablespoons/10g Meyer lemon zest
Juice of 1 large or 2 medium Meyer lemons
1 c/135g fresh raspberries
1/2 c/75g roasted salted pistachio kernels
Additional equipment: 6-7 4oz canning jars with two-part, metal-only, or clamp lids
Directions
-
Step 1
Set your Anova Precision Cooker to 176ºF/80ºC.
-
Step 2
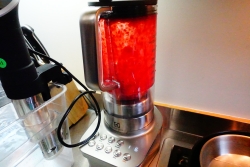
First, place the raspberries in the blender with 2 Tablespoons of water and puree.
-
Step 3
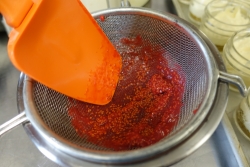
Pass this mixture through a fine-mesh sieve to remove seeds with the help of a spoon or spatula. Catch in a small bowl and set aside.
-
Step 4
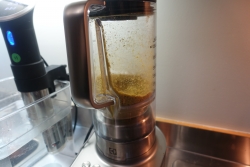
Rinse and dry blender and pulverize pistachios in it to make a fine, cookie-crumb-like texture. Reserve in another small bowl.
-
Step 5
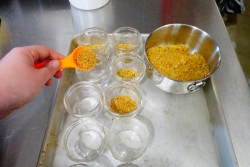
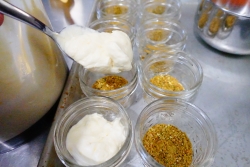
Lay out your canning jars and add 1 Tablespoon of pistachio crumbs to the bottom of each one.
-
Step 6
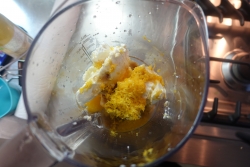
Again, rinse out and dry blender or food processor and add the remaining ingredients. It helps if you break up the cream cheese into smaller pieces first. Process until smooth with no lumps of cream cheese left.
-
Step 7
Drop by heaping spoonful into the jars, filling each halfway.
-
Step 8
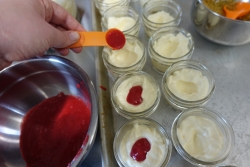
Using a teaspoon, make a little well in the center of the mixture.
-
Step 9
Pour 1 teaspoon of the raspberry coulis into the well.
-
Step 10
Top with additional cheesecake batter to "hide" the raspberry, and fill jar almost to the top.
-
Step 11
Place lids on the jars and tighten to "fingertip" tightness if using a screw lid. This means closed with fingertips only - loose enough for air bubbles to be released.
-
Step 12
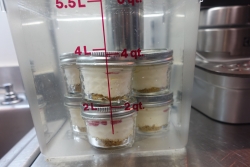
Submerge the jars in the prepared water bath and set timer for 1.5 hours.
-
Finishing Steps
-
Step 0
Remove the jars from the bath and set on the counter to cool for a minute.
-
Step 1
Chill in the refrigerator for at least 4 hours, preferably overnight.
-
Step 2
If you would like to serve without the jar, heat a butter knife under hot water and slide around the edge of the cheesecake. Invert the jar on a plate and while holding onto both jar and plate you will not be serving on, jerk downwards to get the cheesecake to release. There may be a bit of pistachio left inside - just scoop it out and form back to the cake. Take the plate you WILL be serving on and invert onto crust without pressing downwards while holding the "release" plate with your other hand. Flip the plates so that the serving one is on the bottom, and remove the "release" plate from the top. Smooth any rough edges out with a clean, freshly-dipped-in-hot-water butter knife.
-
Step 3
Garnish with additional raspberries, coulis, and pistachio if desired. Enjoy!